How to Use Across Bridge: Step by Step 2026
— By Tony Rabbit in Tutorials

How to use Across Bridge in 2026: pick the right origin and destination chains, check route details, fees, and your wallet before you bridge cross-chain.
Across is one of the cleanest bridges to use when you care about speed and simplicity, but the workflow only feels easy if you prepare the route first. Bridging is rarely where users make money. It is where they accidentally send value to the wrong chain, the wrong token contract, or the wrong destination wallet because they rushed the last confirmation screen.
Intent check: This page is the Across-specific workflow. If you need the chain-agnostic bridging concept first, read How to Bridge Crypto Between Chains
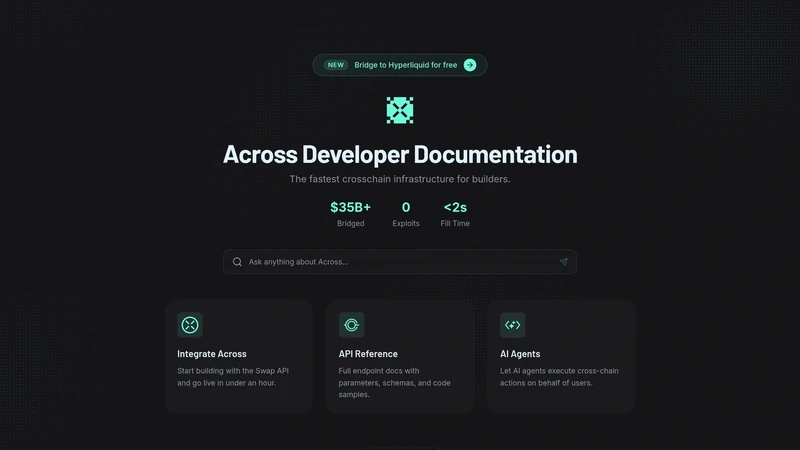
Across frames itself as an intents-powered interoperability protocol rather than a basic token tunnel. On the official site, it highlights a modular system built around request-for-quote routing, competitive relayers, and settlement logic, with headline metrics above $22B in volume, 15M+ transactions, average fill time below one minute, and a claim that bridging 1 ETH can cost under $1. For a first-time user, the practical takeaway is simple: the interface is straightforward, but you still need to choose the route carefully.
Quick answer
- Open Across with the exact origin chain, destination chain, and asset already decided. Do not improvise at the confirmation screen.
- Review the live route details, estimated receive amount, and the receiving wallet you control on the destination chain.
- If the amount matters, send a small test transaction first, then size up only after the route lands correctly.
What Across Is Best Used For
Across is best used when you want to move supported assets between chains quickly without overcomplicating the process. The Across homepage describes its model as user-centric cross-chain intents, where the user specifies the outcome they want and relayers compete to provide the execution path. For a normal user, that matters because it shifts the focus from manually understanding every bridge mechanic to reviewing the route outcome that the interface presents.
That does not mean you should switch your brain off. A bridge is still a bridge. You need to know which chain you are leaving, which chain you are going to, which token you expect to receive, and whether your destination wallet is actually ready on the other side. Across can make the process smoother, but it cannot rescue a bad route choice made by the user.
When Across is a strong fit
What to Prepare Before You Bridge
Before you use Across, decide the route away from the app. Ask yourself four questions: what asset are you moving, what chain are you leaving, what chain are you entering, and what wallet will receive the bridged funds. That sounds obvious, but it is the difference between a calm bridge and a support-ticket bridge.
You should also verify whether the asset you plan to use is actually supported on the live route you want. Across updates routes and supported combinations over time, so the live interface matters more than assumptions. If you are bridging to trade a token after landing, this is also the moment to confirm the destination token contract and chain context on DEXTools before the funds arrive.
The four checks that matter most before bridging
How to Use Across Step by Step
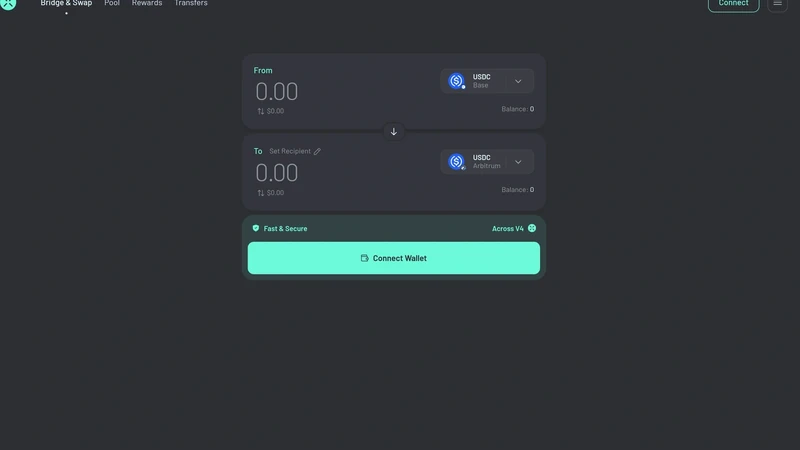
Once the route is clear, the actual Across workflow is straightforward. Connect the wallet that holds the source asset, select the origin chain and destination chain, choose the asset, enter the amount, and review the receive estimate. The app is calm because it wants you to focus on the route details instead of the mechanics happening in the background.
The key is to treat the confirmation screen like a final audit, not a formality. Make sure the route still matches the asset you intend to move, check the estimated output, and confirm the destination wallet context one last time. If this is your first time using the route or the transfer size matters, start with a small test. That habit saves more pain than any clever shortcut.
A safe first-time Across workflow
- Open the app and connect the wallet that holds the source asset.
- Select the origin chain, destination chain, token, and amount with no guesswork.
- Review fees, receive estimate, and any timing details shown in the route preview.
- Confirm that the destination wallet and destination chain are both under your control.
- Send a small test first if the transfer is meaningful, then repeat the route with size.
Common Across Mistakes to Avoid
The most common mistake is assuming that a familiar wallet address means the route is automatically correct. On many EVM chains the public address can look the same, which makes users lazy about the chain check. The second mistake is assuming token symbols are enough. Tickers travel across chains, but contracts do not.
The bridge mistakes that hurt most
How to Troubleshoot Slow or Confusing Transfers
If a route feels slower than expected, start with the basics. Check the wallet activity on the source chain, confirm the transaction really left your wallet, and re-open the destination chain in the receiving wallet. Many "missing" bridge complaints are just visibility problems on the destination side.
If the route is genuinely delayed, avoid panic-clicking new transfers. Compare the live route status, destination wallet, and token visibility first. If you were about to trade the funds on arrival, wait until the correct asset balance is actually visible on the destination chain before taking the next step.
Frequently Asked Questions
What is Across used for?
Across is used for cross-chain bridging and interoperability. Its homepage positions it as an intents-based bridge focused on fast fills and low-cost transfers across supported routes.
How long does an Across transfer usually take?
Across says its average fill time is under one minute, but actual speed depends on the route, the token, chain conditions, and wallet confirmations.
Do I need the same wallet address on both chains?
Often EVM wallets show the same public address across chains, but you should still verify the destination chain and the wallet you control before you confirm any transfer.
What should I check before I bridge with Across?
Check the origin chain, destination chain, supported asset, estimated fees, receiving wallet, and whether the route is actually available in the live interface.
Can DEXTools help before I bridge?
Yes. DEXTools can help you verify token contracts and chain context before you move assets to a new chain where contract confusion is common.
Related DEXTools tutorials
Disclaimer: This article is for educational purposes only and does not constitute investment, legal, tax, or financial advice. Bridge routes and supported assets change over time, so always verify the live route, destination wallet, and token context before sending funds.
Related Guides
- What Is Crypto Bridge Slippage? Why Cross-Chain Transfers Drift (2026)
- Top 5 Crypto Bridge Tools in 2026: Best Cross-Chain Options Compared
- Jumper Exchange Tutorial 2026: Cross-Chain Bridge Master
- deBridge Tutorial 2026: DLN Cross-Chain Bridge Guide
- How to Bridge ETH to TRON: Complete Cross-Chain Guide (2026)